Quick Guide to Polishing
Here are the three basic steps that are usually required to polish aluminum to a mirror finish. The steps are the same for both old corroded aluminum and new aluminum fresh from the mill. The main difference is the amount of time and effort required during the initial step, the compound polishing.
Each of these steps and the equipment required is covered in detail in this web site. For more information, click on the appropriate page in the menu above.
Step 1. Compound Polishing
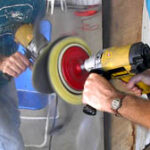
Unless the aluminum has been previously polished it will have to be compound polished using a rotary polisher such as this drill or a right-angle car buffer. Even new aluminum with an Alclad finish will have to be compound polished. This “reforms” the surface of the aluminum so that it can be polished to a mirror finish. It also removes corrosion and minor scratches.
The polishing bonnet is wool and the polish used is one of the coarser grades of Nuvite such as Nuvite C or F7.
A quick word about Nuvite polish. It comes in 5 grades with varying degrees of cut. Damaged or corroded aluminum is compound polished using one of the coarser grades. A finer grade can be used on aluminum that is new or in good condition.

Step 2. Removing the Swirls
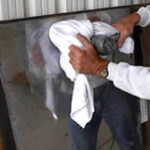
The compound polisher will leave prominent swirl marks in the aluminum. These are removed using the Cyclo polisher and one of the coarser grades of Nuvite. The Cyclo polisher is a dual head random orbit polisher. Our polishing method uses cotton sweatshirt fleece wrapped around the heads of the Cyclo polisher.

Step 3. Finish Polish
After removing the swirls with the Cyclo polisher the surface is polished again with the Cyclo polisher and the finish grade of Nuvite. This removes the fine scratches left by the coarse polish and brings out the mirror finish with great depth of image.

