Using the Cyclo Polisher
What follows is a polishing primer. Many variations of the basic technique presented here are possible. You will probably develop your own personal method over time.
The Cyclo polisher is used as the finish polisher and to restore aluminum surfaces that have been polished before and are weathered but not corroded or scratched. The Compounding polisher is used to restore corroded or damaged surfaces, and to re-form the surface of new aluminum so that it can be polished to a mirror finish.
Polishing Procedure
The first thing to decide is which grade of Nuvite to use. Weathered or dull (but previously polished) surfaces will need to first be polished with one of the coarse grades (G6 or F7) followed by a finish polish with the fine grade, Nuvite S. Surfaces in better starting condition may only require polishing with the fine grade.
The coarser grades leave a network of very fine scratches on the surface that is removed by the finish polish. But you might be satisfied with just one polish with one of the coarse grades.
Visit our Nuvite Application Guide page for more specific recommendations.
Good luck. Polishing is hard work but the results are rewarding.
Step 1
Collect the necessary materials.
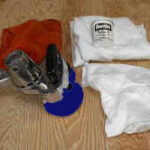
You will need the Cyclo polisher, Nuvite polish, the cotton FleeceWraps and microfiber towels for final buffing.
As explained in the following steps, the FleeceWraps are used to apply the Nuvite via the Cyclo polisher and work the surface. This is followed by using the microfiber towels to remove any residual polish and buff the surface.
Step 2
Get the Cyclo polisher set up. The Cyclo polisher is fitted with our Black Foam polishing pads which are covered with the Navy-colored Pad Covers that help keep the pads clean. This is the standard polishing setup.
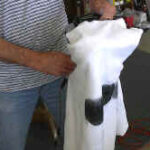
Using FleeceWraps: Our FleeceWraps cloths shown here are pre-cut to the optimum size and have slits cut into the corners and sides.
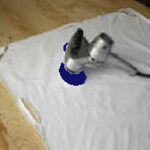
The cloth stays in place while you polish. You don’t have to pay constant attention to keeping the cloth properly positioned under the heads of the polisher.
Visit the Polishing Cloth page for more information on FleeceWraps.
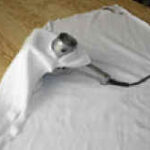
These slits fit over the motor housing or front handle of the Cyclo polisher. The tail of the fabric is rolled up and clamped in front of the motor housing using the blue hand-cuff type ratcheting clamp shown in the next photo.
One of the blue clamps is furnished with each 10-pack of FleeceWraps.
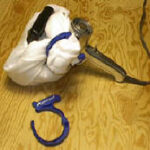
Not Using FleeceWraps: Use this method for wrapping the cloth around the Cyclo polisher if you’re not using our pre-cut FleeceWraps.
Grab the polishing cloth and wrap it around the front handle of the polisher, gripping it tightly.
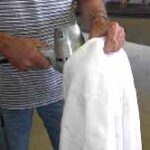
Pass the cloth under the polishing heads and grab the other end of the cloth and wrap it around the rear handle of the polisher.
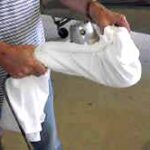
Step 3
Apply a dab of polish to each head of the polisher. Use about 1/4 teaspoon (a dab about half the size of an M&M candy) on each head.
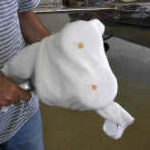
Step 4
Polishing is done in small sections, about 2 or 3 feet square. Before starting the Cyclo polisher, touch the heads in two or three spots in the selected area to spread the polish around a bit.
Then start the polisher and work the polish into the surface. Polish until the surface of the aluminum turns uniformly lightly black. Then keep polishing until all of the black is gone.
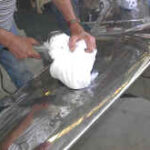
Do not push down on the polisher. The weight of the polisher is all the pressure that is required. If you push down you may get hockey-puck sized scuff marks.
Keep polishing until there are only bits of residual polish around rivet, in gaps, etc. This should be the only black left on the metal. It will be removed with the microfiber buffing towels.
Important: The most common mistake is using too much polish. It is just human nature to think that more is better. Use only enough to get the surface lightly black, with lots of metal showing through. If the surface turns opaque black, you’re using way too much polish. This is true for all the grades of Nuvite, and equally applicable when using the Compounding Polisher.
If too much is used, the polish acts as a lubricant and prevents the cutting/polishing action from being effective. The polish should begin to disappear after about 30 seconds of polishing and it should be all gone and the surface virtually dry before you quit. The cutting/polishing action is most effective in those last moments when the polish is disappearing.
Step 5
Next, hand buff using the microfiber towels. Work around the rivet heads to remove all traces of residual polish. Any polish left on at this stage will dry on and become almost impossible to remove later.
Corn starch or flour can be sprinkled on the surface or added to the towel to aid in removal of residual polish.
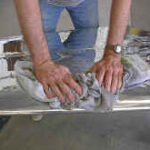
As explained in the Cleaning Tips section at the bottom of this page, a solvent such as mineral spirits (paint thinner) can be used to assist in the removal of residual polish. This is quite acceptable when polishing with one of the coarser grades of Nuvite, but when the finish polish is done with the S grade, only the microfiber towels should be used. Using a solvent after the finish polish will remove the protectants in the polish.
The microfiber towels have a real affinity for the polish and will remove virtually all residual polish from around rivet heads. Plus they won’t scratch no matter how hard or long you buff. Note: The threads that are used to bind the edges of the towels can scratch so buff using the center of the towels.
Step 6
Now start the whole process over on a new section. Position the polishing cloth so that a clean section of cloth is used to apply the polish.
You may wish to do two sections before moving clean cloth under the heads. But it will take considerably longer for the Cyclo polisher to remove all of the residual polish on the second section. You will get faster, more consistent results if you put clean cloth under the heads for each section.
Step 7
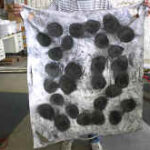
After polishing maybe 50 square feet, the polishing cloth will have become thoroughly caked with polish with no clean areas left.
At this point discard the polishing cloth.
Cleaning Tips
It is very important to clean as you go. Residual polish should be removed from around rivet heads and from seams as the polishing project progresses. If it dries on it is very difficult to remove. One way to do this is to use a solvent to wipe the surface. The best solvent we have found is mineral spirits (paint thinner). It evaporates slowly and generates far fewer toxic fumes than solvents such as lacquer thinner. But solvents such as lacquer thinner work well if there is adequate ventilation. Best method is to use a microfiber towel to wipe the solvent off and dry the surface.
If you are polishing with one of the coarse grades of Nuvite in preparation for a finish polish with Nuvite S, it is important to remove all traces of the coarse polish before moving on to the finish polish. We recommend cleaning the surface with solvent after polishing with the coarse grade before starting the finish polish.
If you are doing the finish polish with Nuvite S, the surface should not be cleaned with a solvent after polishing because that would remove all of the polish and protective products in the polish. Instead, use a minimum amount of polish and pay careful attention to buffing around the rivet heads and other areas were residual polish has accumulated. If you don’t remove the residual polish at this point, it will likely be with you forever.
Cleaning with Cornstarch: A customer recently reported that using cornstarch rather than mineral spirits for cleaning was very effective and eliminated the need to deal with a solvent. Using cornstarch or wheat flour to remove residual polish is an old trick that was in widespread use 50 years ago. Just use the microfiber with cornstarch rather than with mineral spirits. It seems to work quite well if the polish is really fresh. Dried on polish generally needs a solvent.
This page is available as a printer-friendly Adobe Acrobat .pdf file. Click here to open the .pdf file.
